An Easy Wood Burning Project for Beginners
Creating beautiful wood burning art isn’t hard. These coasters are an easy wood burning project for beginners. The design possibilities are endless and they make really nice homemade gifts for the upcoming holidays.
This post contains affiliate links, which means I make a small commission at no extra cost to you. See my full disclosure here.
Wood Burning for Beginners
Let me start by saying, I have wood burned approximately 3 times in my life. I’m very much a beginner. I feel like much of my family’s natural artistic talent went to my older brother and younger sister. In the past, I have let that keep me from doing “artsy” things because it just didn’t feel natural.
However, I’ve definitely surprised myself over the years when I have ventured out into the “art world.” I am able to make art that I think looks nice. Maybe it’s because my expectations are so low it’s easy to impress myself.
It’s Ok To Copycat Artistic People
My naturally artistic sister made some wood burned coasters for my parents years ago and I’ve often thought they looked pretty. Our coasters have finally bit the dust and I decided I wanted to try my hand at wood burning and make some coasters myself.
Living on a farm with lots of apparently weak trees, we loose limbs in almost every storm that comes through. We have a large woodpile of mostly pine trees limbs, but sometimes we get a limb down from one of our maple trees. One such limb had been aging in our wood pile for awhile when I decided it was time to venture out in my art skills and make some coasters.
It was actually last year, around this time, that I used the chop saw and cut a bunch of little coasters. I made several coaster last year as gifts for Christmas but never got around to making some for myself.
Fast forward a year and I have finally made some coasters for our family to use.

Supplies for an Easy Wood Burning Project for Beginners
- Wood – Sliced logs
- Wood Burning Kit
- Tung Oil (optional)
- Palm Sander or Sand Paper
- Inspiration pictures – google image search wild flower sketch for ideas
- pencil
Steps for an Easy Wood Burning Project for Beginners
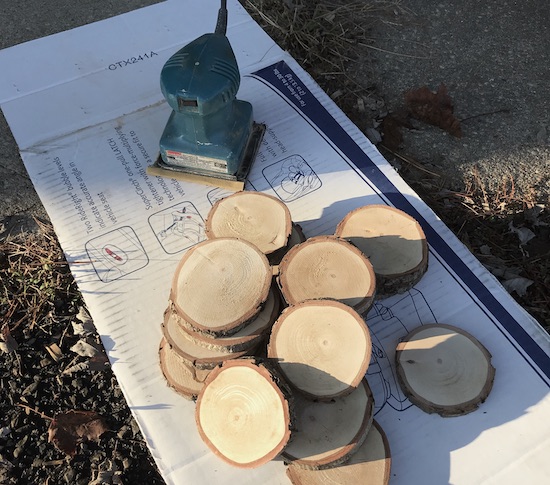
Step 1 – Find an old/aged tree limb in your yard or the park and cut into slices with a chop saw. You can also purchase wood slices too if you’d rather not do this step yourself. Personally, I like making my slices a bit thicker than the ones I’ve found online.
Step 2 – Sand wood slices until they are smooth. This makes wood burning easier.
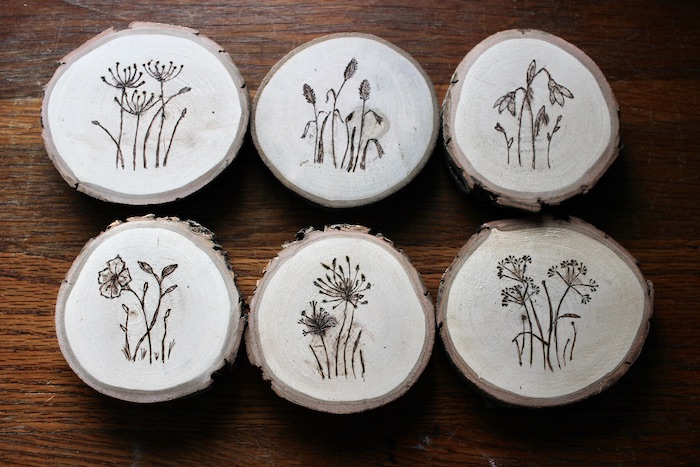
Step 2 – Google search images for wild flower sketches or any other ideas you might have.
Step 3 – Lightly draw or trace with a pencil onto your wood slices. I’ve found you don’t need to add much to make it look pretty. Sometimes minimal makes a bigger statement than more.
Step 4 – Turn on your wood burner and start burning. Start lightly, you can always darken it up later by going over it again. Tip: I found it helpful to watch a few youtube tutorials before I started. Here’s a helpful video: Wood Burning for Beginners
Optional step 5 – Sealing the wood with polyurethane, varnish, or lacquer. Or if you like a natural option, use tung oil or leave natural like I’ve chosen to do.
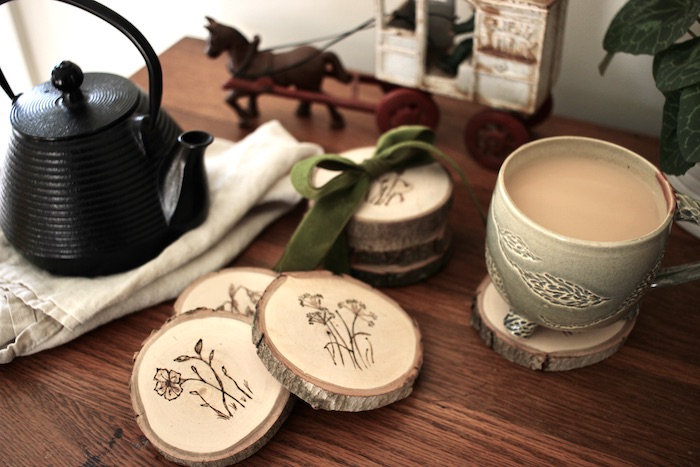
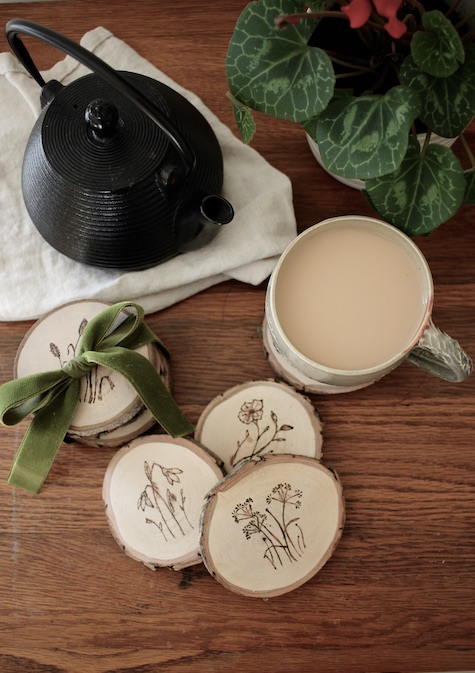
An Easy Wood Burning Project for Beginners – A Beautiful Handmade Gift
Once you get the hang of wood burning, it’s easy to make a little set of coasters to give as gifts for the holidays to friends and family. Tie them together with twine or a pretty ribbon and they can make a very meaningful but inexpensive gift.
Shop This Post
More Holiday Crafts
Pin It For Later


Those are beautiful! I like the old school Makita palm sander too. Makita made the best sanders.
Thanks Cheryl! It’s my mom’s trusty old sander. My dad’s a huge fan of makita products.