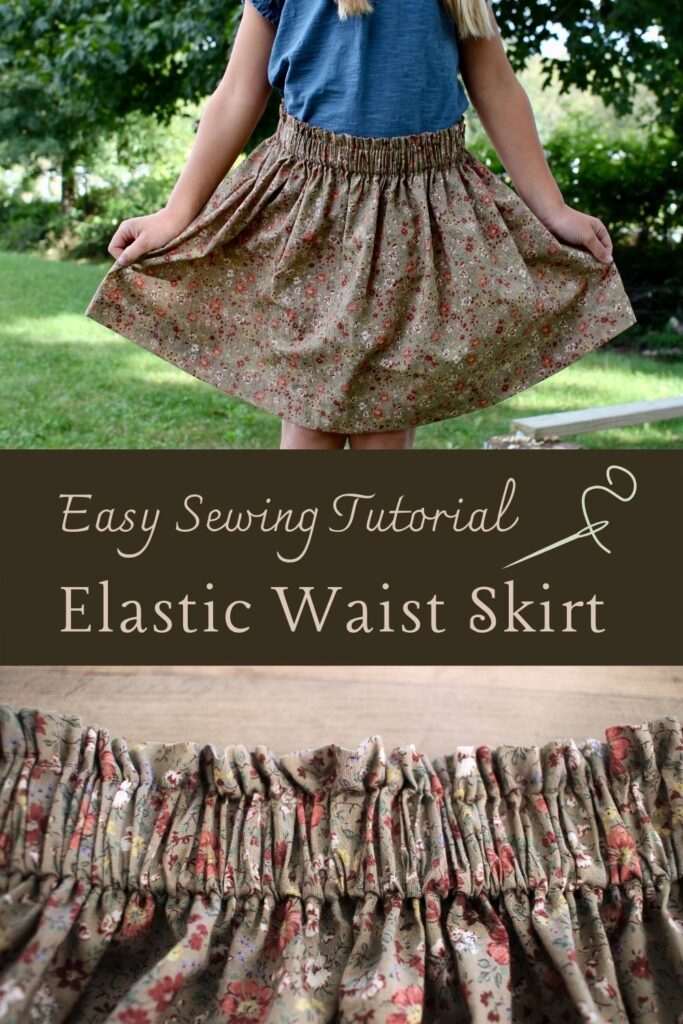
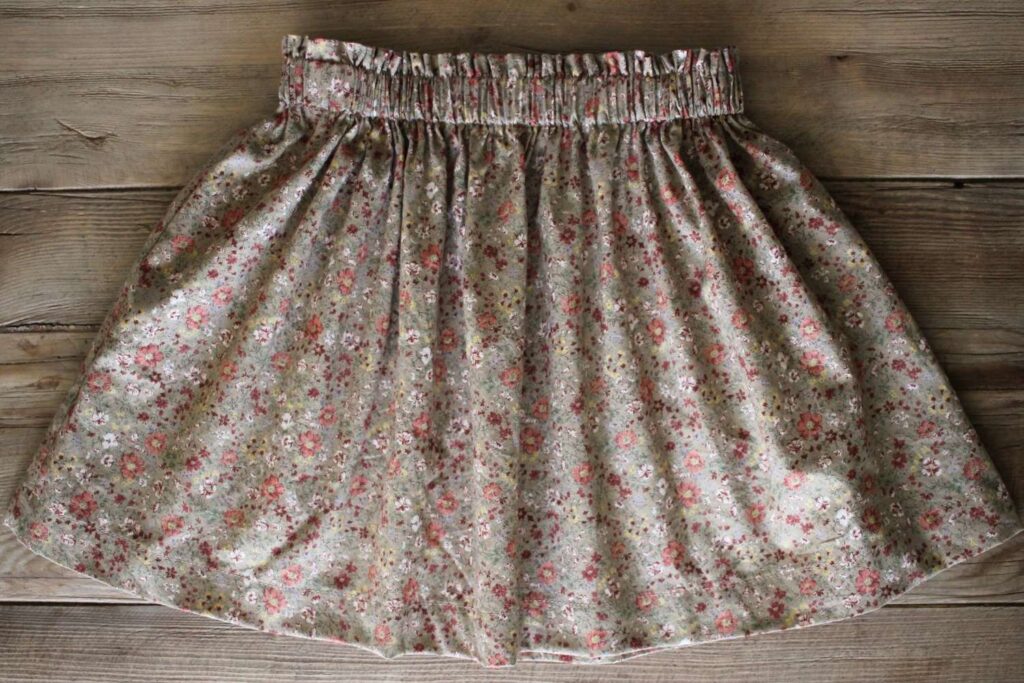
Simple Elastic Waist Skirt Sewing Tutorial
Learn to sew this simple elastic waist skirt with this simple to follow sewing tutorial. This is a perfect beginner project and the result is an adorable ruffled top skirt.

This post contains affiliate links, which means I make a small commission at no extra cost to you. See my full disclosure here.
Making Your Own Clothing
My middle daughter inspired me to sew my first ruffled elastic waist skirt when she came out of her bedroom wearing a little skirt that she had definitely outgrown. She’s my girly girl and loves wearing dresses and skirts as much as possible.
Right then and there, I decided to sew another skirt that would fit her. I had some light pink linen fabric on hand that I had intended to make a dress out of for my youngest but as this seemed more pressing, I decided to use it for a little skirt instead.
Quickly I measured my daughter’s waist and length to the knees and started cutting and sewing. Despite all the kid interruptions, it took under an hour to sew together this skirt.

It made my little pink loving, skirt and dress loving daughter very happy! It also made me happy too. Every time I see her wearing it, I think “I made that!”
I have long wanted to start sewing my children more of their clothing as I love the handmade style and it can be quite expensive to purchase those items new. This felt like the start to doing just that!
Learning to Sew
It can be intimidating to learn to sew. I don’t know about you, but if I put time into something I really want it to turn out the way I imagined it would. This is especially true for me when it comes to homemade clothing. I hate to see my kids wearing something that looks misshapen because it wasn’t sewn property.

I’ve been slowly working on my sewing skills for a number of years but one thing I’ve learned is that following a pattern can be a little tricky. I find it easier to see rather than to read an explanation of what I’m supposed to do.
This pattern, however, is just so easy to sew that it is the perfect beginner project. Most likely you will be able to have this ruffle topped skirt done in under an hour.

While this could be made into a skirt for an adult, I haven’t tried to make one for myself yet. I love this style on my little girls though.
If you like dressing your girls in handmade style clothing then you will love to add this simple and adorable skirt to their wardrobes.
Tools & Supplies for Simple Elastic Waist Skirt
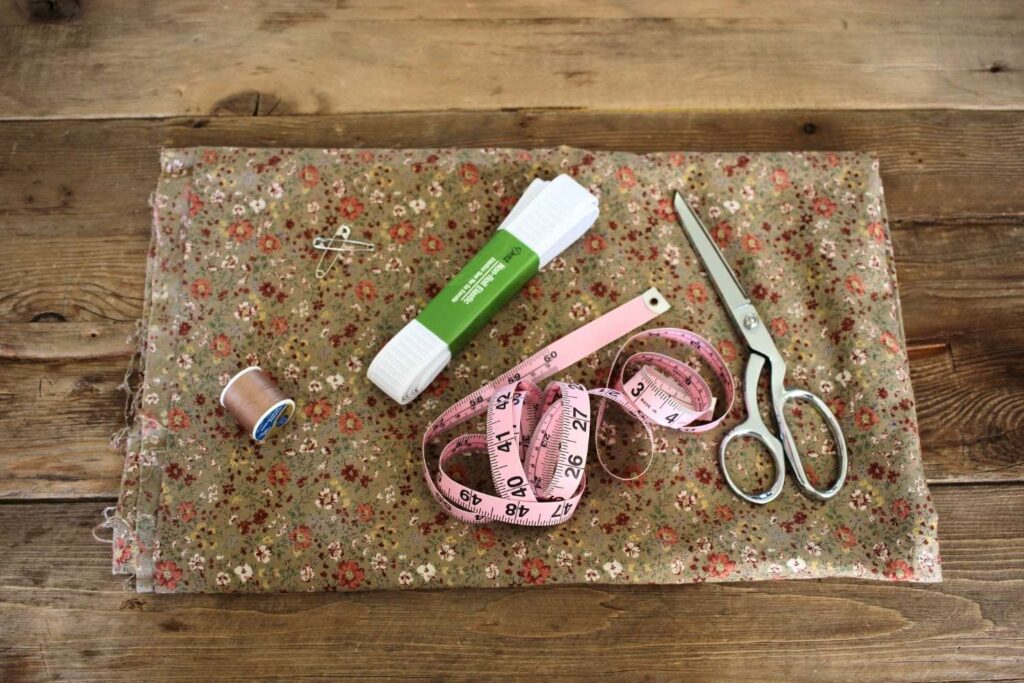
Sewing machine – I own a vintage Singer sewing machine that my mom got for me at goodwill. If you are just starting out sewing, check Facebook Marketplace. I regularly find decent quality machines at great prices. If you want to purchase new, here’s a simple machine I’d recommend to get you started.
Fabric – I’ve made this skirt with really lightweight fabric as well as a slightly thicker linen. They both worked well.
The amount depends on the size you are going to make. Obviously you will need much more if you are making an adult size and less if you are making a toddler size. See how to measure below.
Iron and ironing board – These make sewing much easier as you can iron out any wrinkles and iron down hems.
Non-roll 1 inch elastic – The non-roll elastic is slightly thicker than regular 1 inch elastic.
Thread – Thread color matched to your fabric is always nice but plain white or black work well too.
Scissors – Good quality sharp sewing scissors. Only use sewing scissors to cut fabric and the like. Never use them on paper as this will dull them very quickly.
2 large safety pins – for threading the elastic through the waist.
Tape Measure
How to Measure for Skirt Size
Width – Begin by measuring the waist where you want the skirt to sit. This is the measurement you will use to cut your two skirt pieces.
The waist measurement is flexible depending on how full you would like the skirt to be. For a fuller skirt add 8-12 inches onto the waist measurement. Fuller skirts work well for a lighter weight fabric.

Length – Measure from the waist down to where you want the skirt to end. You will add 5 extra inches to this measurement to get the length you need to cut the fabric to.

My daughter measured 22 1/2 inches at the waist. Because my fabric was very light weight, I chose to add some extra fabric to the width to create a fuller skirt. So I cut the front and back skirt pieces at 30 inches wide. The length to her knees was 13 inches so I added 5 inches and cut the length of the fabric to 18 inches.
Another way to figure out sizing is to measure other skirts that fit. I was also able to get accurate measurements using this skirt as a template.

Simple Elastic Waist Skirt Sewing Tutorial
I’ve tried to make the instructions as understandable as possible. If something isn’t clear or you have a question please let me know in the comments below and I will respond as quickly as I can.

Step 1
Wash, dry fabric and iron fabric. Washing and drying fabric will prevent the skirt from shrinking after it is made.
Step 2
Cut 2 rectangle pieces of fabric the width of the waist measurement (or 8-12 inches extra for a fuller skirt) and the length plus 5 extra inches.

Step 3
Sew a French seam. Place rectangle pieces wrong sides together. This means the faded sides together.
Sew a 1/8 inch seam allowance down the short sides of each skirt piece to attach the skirts together. Make sure to forward and back stitch a few times at the top and bottom to ensure the thread won’t unravel.
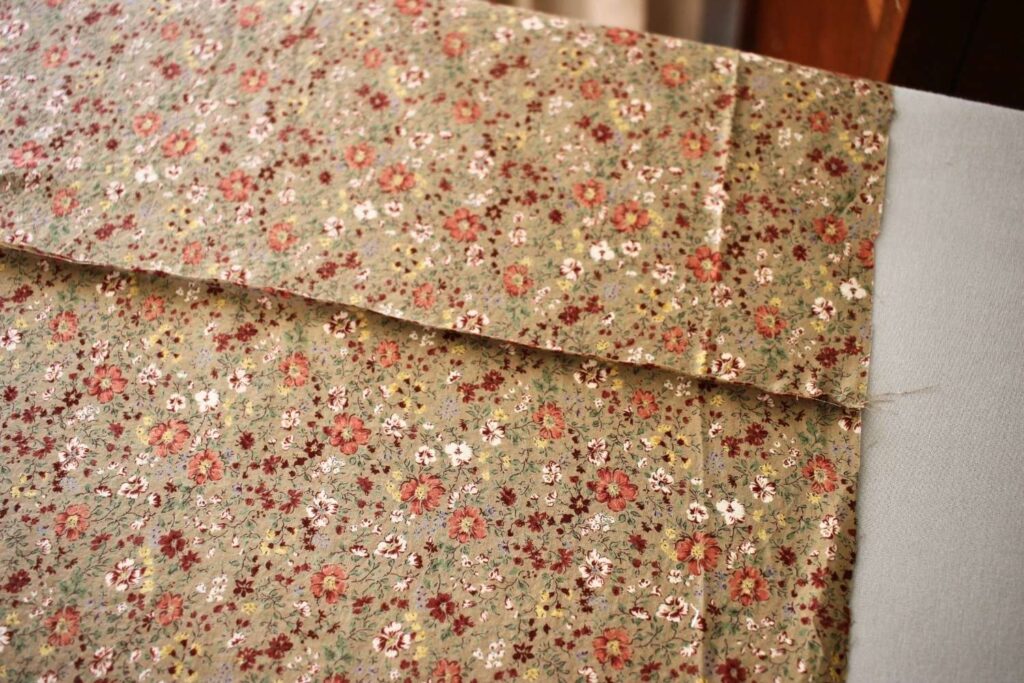
Then turn the skirt right sides together and iron flat on the side seams.

Sew a 1/4 inch seam allowance down the short sides of each skirt piece to encase the raw edges, thus creating a french seam. Make sure to forward and back stitch at the top and bottom.
Iron seams flat.

I like to seam french seams because it will keep the raw edges of the fabric from fraying. This step ins’t necessary if you’d prefer to sew a zigzag stitch or use a surger instead.
Step 4
Fold the hem on the bottom of the skirt 1/4 inch under and iron flat. Fold again 1 inch under and iron flat.


Sew the bottom of the skirt close to the fold at 1/8 inch seam allowance all the way around the bottom of the skirt. Make sure to forward and back stitch at the beginning and ending points.
Step 5
Fold down the top of the skirt 1/4 inch and iron flat. Fold down again 1 3/4 inches and iron flat.
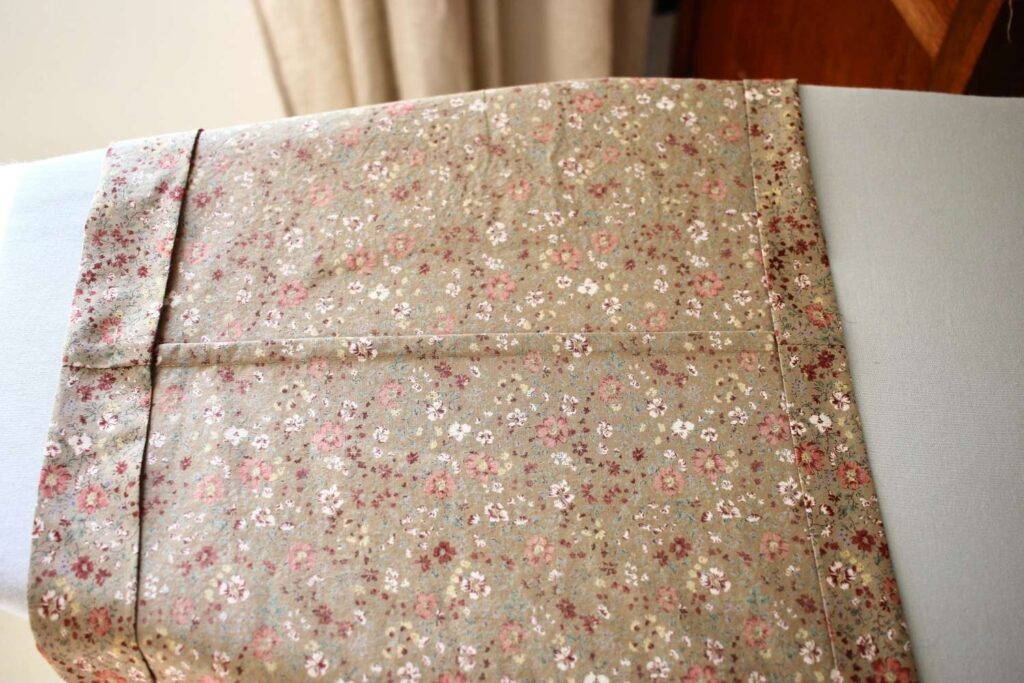
Sew all the way around the top of the skirt leaving a 2 inch gap between the start and stop. This will be the opening to thread the elastic through. Be sure the forward and back stitch at the start and stop. Sew close to the edge of the seam at 1/8 inch.
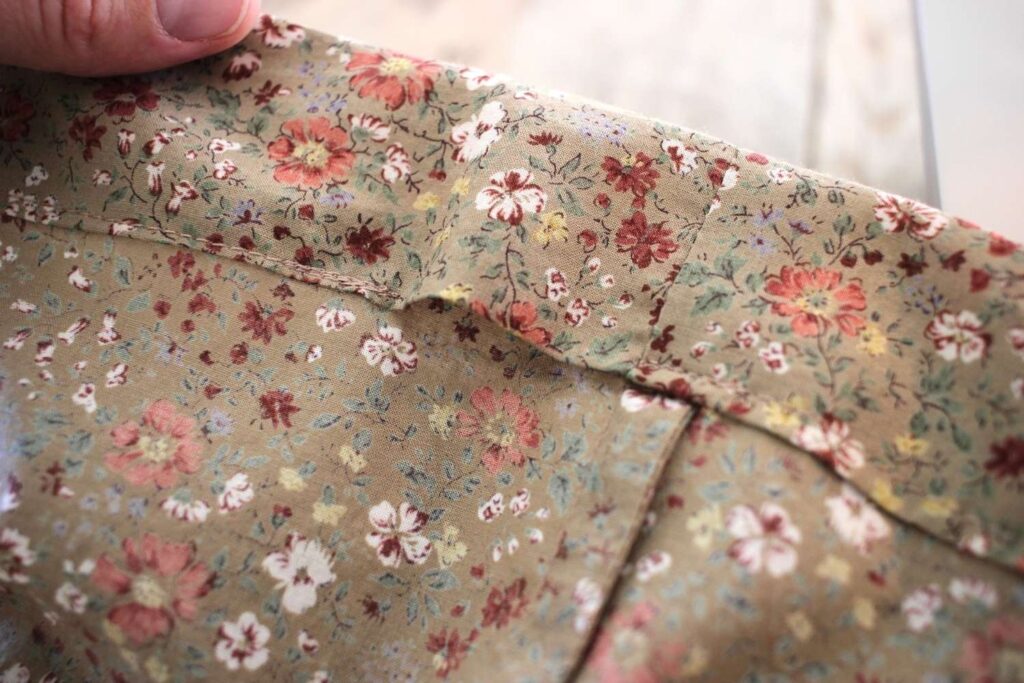
Sew another seam 1/2 inch from the top of the skirt to create the ruffle effect. Don’t leave a gap on this one. Forward and back stitch at the start and stop points.

Step 6
Cut elastic 1 inch larger than the waist measurement. Attach one end of the elastic to the skirt with a safety pin. This will keep the elastic from disappearing into the casing when fishing it through.
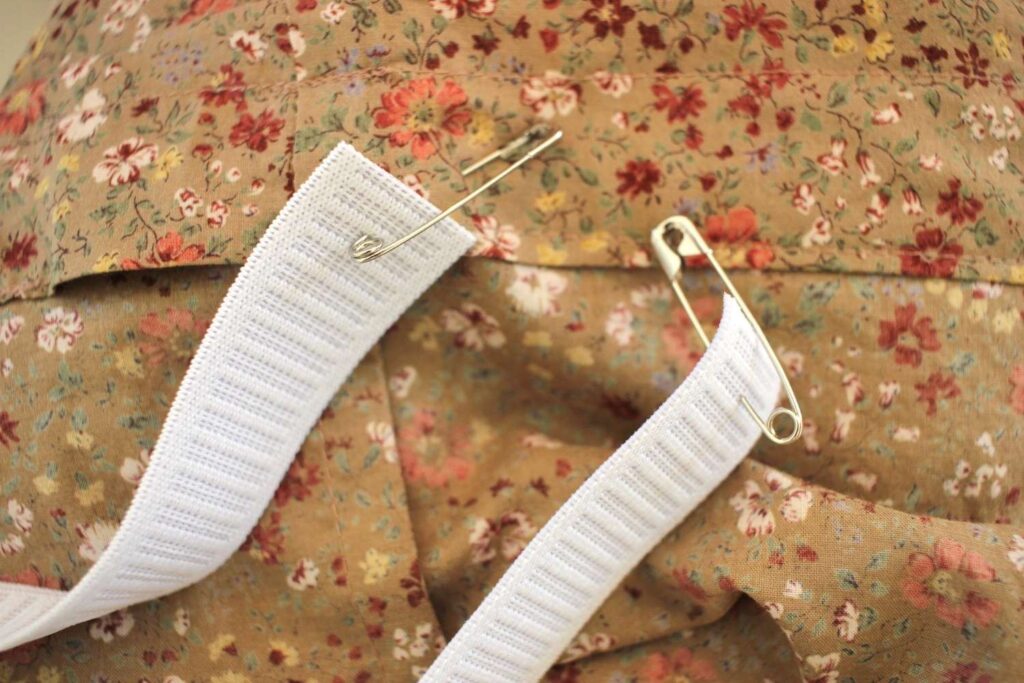
Attach another large safety pin to the other side of the elastic. Push the safety pin into the 2 inch opening and start to gather the fabric around the safety pin and push it through the casing. Continue until the safety pin reaches the 2 inch opening again.
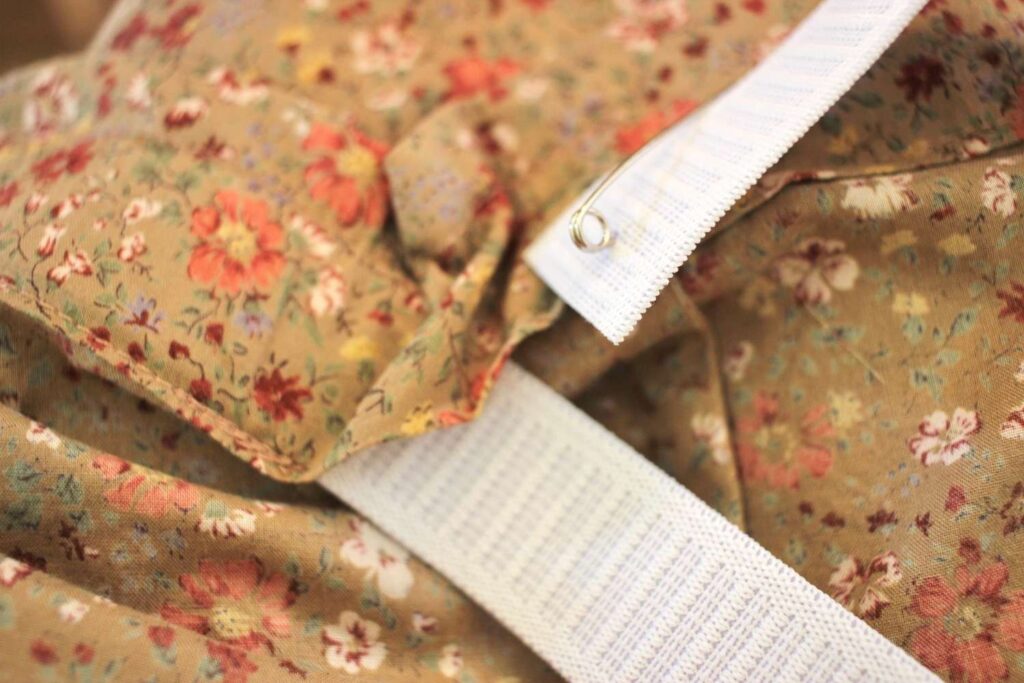
Pull the elastic out on both sides several inches. Remove safety pins. Overlap each side of the elastic 1 inch and forward and back stitch each side together several times. Before you stitch together make sure the elastic is not twisted at all.

Step 7
Pull the elastic into the casing all the way. Stitch the 2 inch opening closed remembering to forward and back stitch a few times. Trim all the loose threads.

You’re Finished!
Congratulations! You are finished.
Let me know in the comments below if you give this simple sewing project a try or tag me on instagram with a picture of your skirt.
Related Posts
How to Sew a Little Girl’s Pinafore Apron
An Easy Wood Burning Project for beginners
Pin for Later – Simple Elastic Waist Skirt Sewing Tutorial